Popular Posts

Wednesday 20 November 2013

Ogre Designers Edition Kickstarter

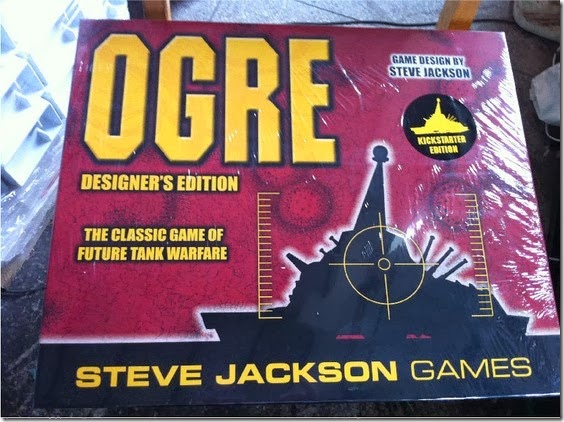
Last year I supported Steve Jacksons Kickstarter to do a large version of his 1970’s game Ogre (one great battle tank vs well everything). I had read a lot about it but never played a game, well now was my chance to get a good-sized version.

ogre01

With a target of $20,000 it in fact went to almost a million dollars and thousands of copies have been produced.

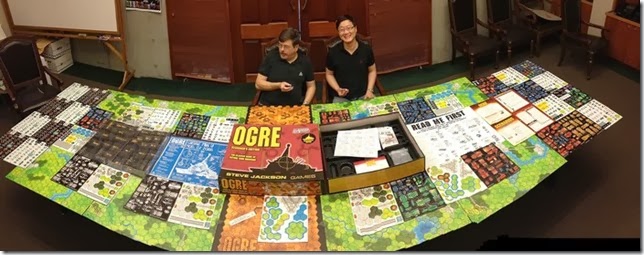
Its massive as you can see below

ogre02

In fact the only place that I can think of with space enough to play this is Portcullis in Bolton, it might just overwhelm the tables of the coffee shop in Leyland.

I have just finished punching and assembling all the counters. I now have 34 various types of 3D Ogres plus loads of 3D buildings and loads of ordinary gaming counters.

But just to add to my (as yet unused) Ogre collection I have bought the Nightfall campaign from Fire Mountain Games.

Tuesday 20 August 2013

Veni Vidi Vici website down

Don’t worry, its just moving to a new server. Emails are down as well.

OK situation is now getting better, website has been moved to a new sever and is being tidied up/checked for problems.

Emails are working again.

The VVV shop is now working again. Most of the functionality has been restored to the shop, most importantly the ability to shop on one page and then move to another page, whilst the cart remembers what you had just bought.

One thing is that the currency is not remembered and goes back to its default (pounds) on the change to another page. So just before you pay, make sure that the currency is set to the one that you want to use.

Thursday 15 August 2013

Quick Battle Report Late Romans vs Avars

A 1500 point battle using the Late Romans against one of the new lists, Avars. Using 6mm figures and played a Portcullis Wargames Emporium, Bolton.

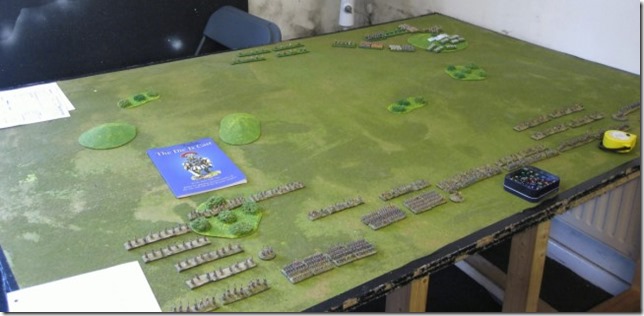
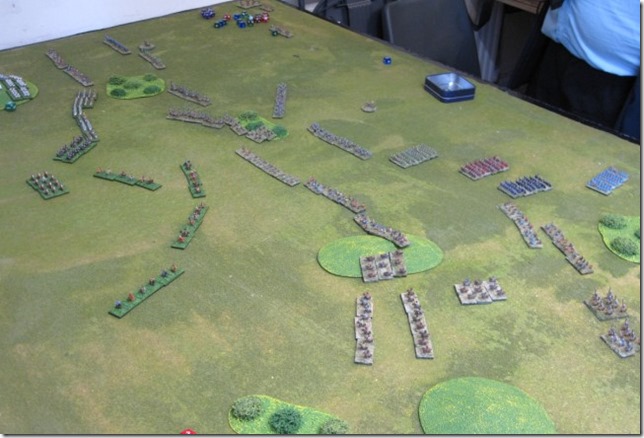
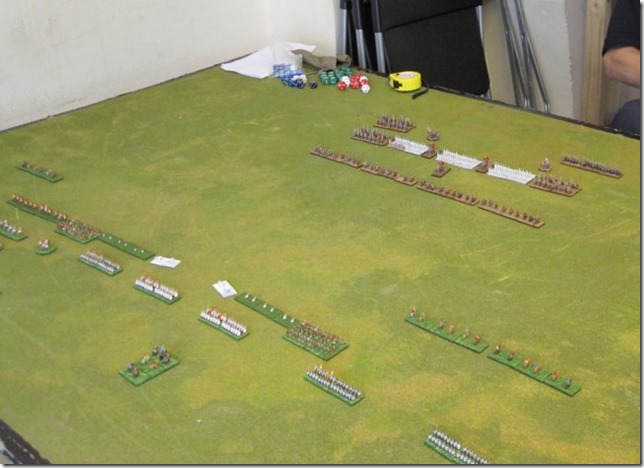
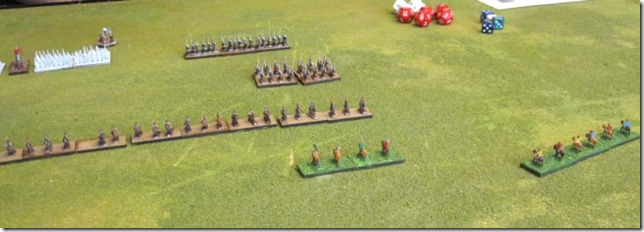
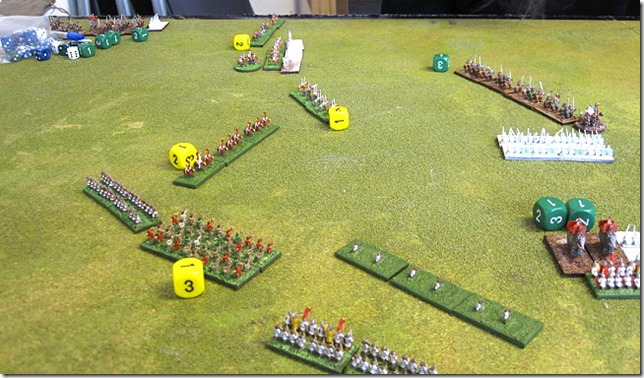
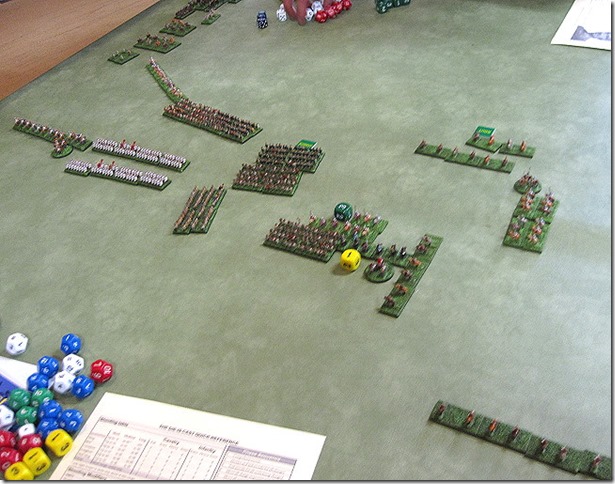
The initial set-up, with the Romans on the far side of the table and the Avars nearest to us. At this point the Roman player said, are you sure that you got the points for those right? there being about three times as many Avars as Romans. We went through the lists and despite being upgraded (to Average morale class, from Raw) the Avars were precisely right, there are just rather a lot of them. So this was going to be a real test of the Die is Cast rules, can armies with such a huge imbalance in numbers fight a ‘fair and even’ game. The first point to note is that the Romans have clustered their army around a hill (top right of picture) stuffed the hill with archers and 4 pieces of artillery.

080413_01_s

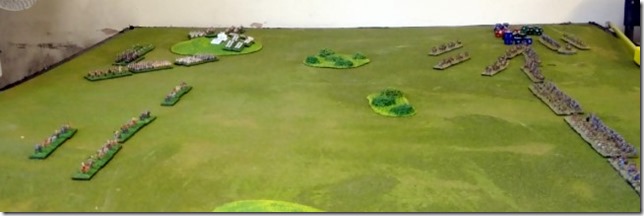
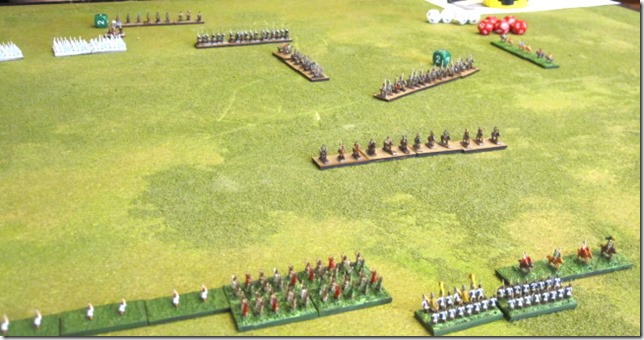
After movement on the first turn. A group of 4 units of Avar light cavalry and 2 units of heavy cavalry move to attack the hill.

080413_02_s

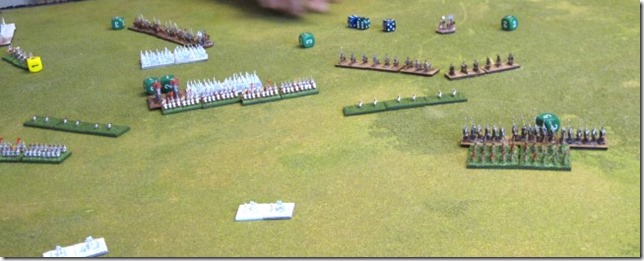
After end of shooting on turn three. The Romans have moved out from the hill and have started shooting at the units of Avar light cavalry. The Avar have suffered one unit destroyed and another damaged.

080413_03_s

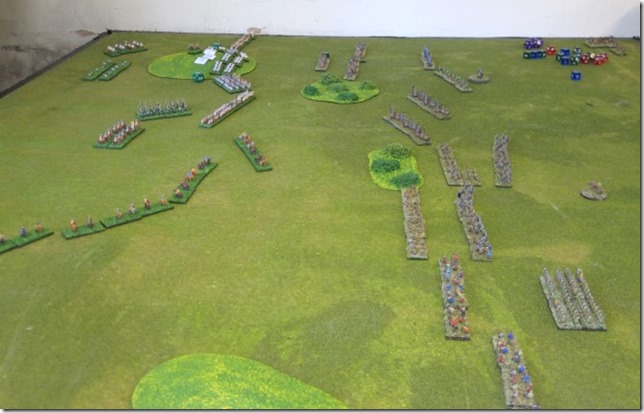
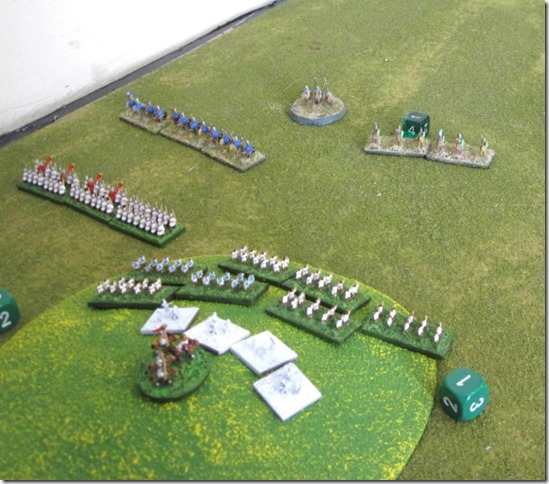
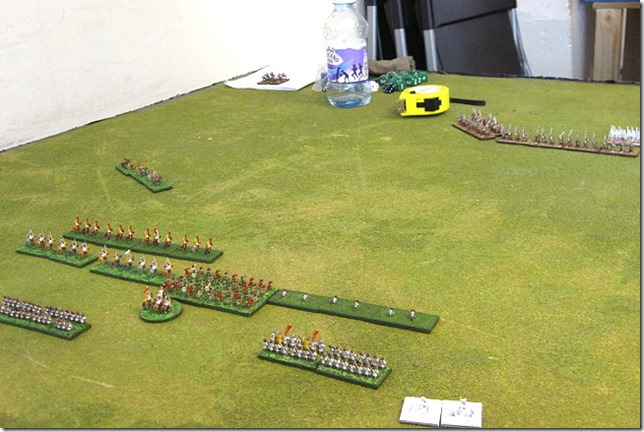
After end of movement on turn 5. The Avars have lost the front two units of light cavalry to Roman shooting from the hill. In turn they have caused some casualties on the Roman archers and legionaries (between the edge of the table and the hill). the main force of Roman foot (two units of auxiliaries and two units of legionaries) supported by cataphracts and extra cavalry move to block the gap between two patches of scrub. Meanwhile the Avars are moving two units of Extra cavalry (the Avar nobles) through that gap. The Roman legions form shieldwall and get their javelins ready. Javelins instead of pila to give them a bit of distance firepower.

080413_04_s

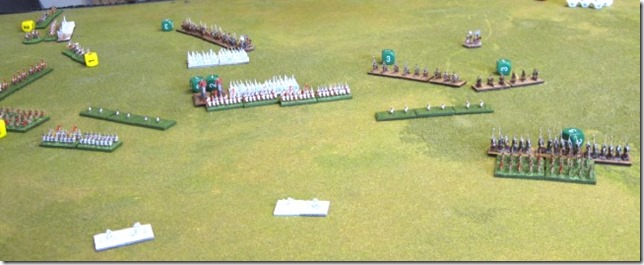
Same point in the game but this is the view of the whole armies. The Avar are trying to bring up the rest of their army, forming the infantry into columns of march to get there quicker (right side of picture). The Romans are using 4 units of light cavalry to delay the Avar advance but equally the Avar are using their light cavalry to try and push the Romans back. Both  sides are getting to bow range on the right.

080413_05_s

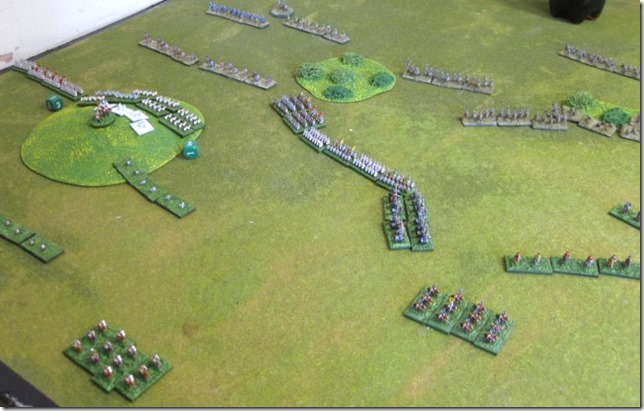
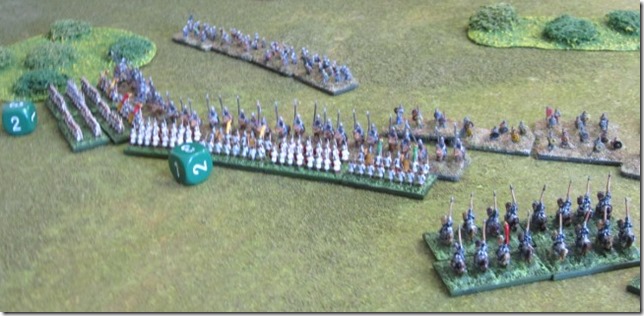
On the sixth turn the Avar extra cavalry charges into the Roman legionaries and auxlia in the centre. The Romans attempted to charge as well but a cavalry charge negates an infantry charge so the Romans just stand and fire. The Avars will also shoot with their bows as they charge and then switch to lances for the combat. Behind the Avar cavalry are axemen (top of picture) and skirmishers (right of picture). Behind Romans (bottom right) are their cataphract cavalry.

080413_06_s

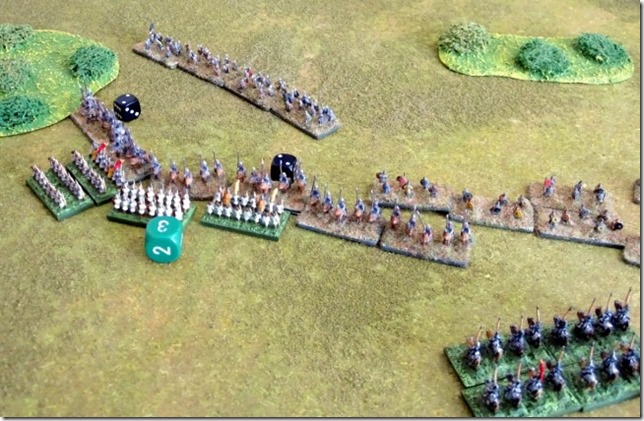
In centre on the sixth turn, after shooting and combat. The Romans have held. The Avar shooting was incredible destroying an entire unit of auxila and severely damaging another. But the Romans held fast and took the cavalry charge, unfortunately the Roman javelins bounced ineffectively off the heavily armoured Avar cavalry.

But the combat was a draw! Although both sides were rolling 8 dice apiece (the Romans needing 3 or less, the Avars needing 6 or less) the result was 4 hits caused on each side. That completely destroyed another unit of Roman auxlia and inflicted 2 damage points on each of the Avar cavalry units (the black dice). So neither side had to test morale for losing the combat and the Romans had to test for seeing two of their units wiped out. But with good die rolls they held.

080413_07_s

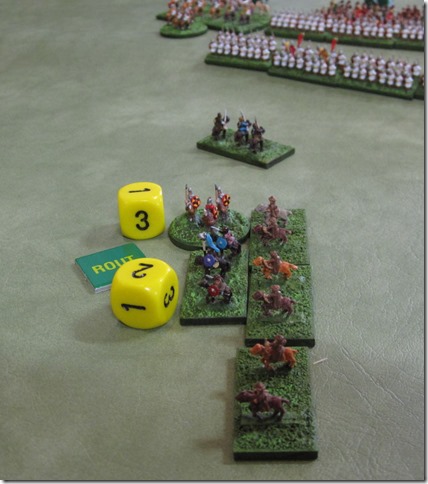
The Avar attack on the hill failed. Two of the units of light cavalry were destroyed by shooting, two broke and ran. One of the units of heavy cavalry was heavily damaged and the other unit tried to charge but failed its morale test and retreated instead. So that was the end of that attack.

080413_08_s

Sorry no pictures of the end of the game but the Roman cataphracts charged one of the units of Avar extra cavalry and in the huge mixed melee that followed (2 units of Roman legionaries, a unit of cataphracts vs 2 units of Avar extra heavy cavalry) the Avar were heavily defeated (5:1) and both units of Avar cavalry fled. At that point we ended the game and all went to the pub.

Now there was still a lot of the Avar army left on the table. All that infantry which was steadily marching toward the Romans but I think that without the support of their own cavalry they would have been dead, outmanoeuvred and out-fought by the Roman. The big mistake (acknowledged by the Avar general) ) was not attacking all together. In effect the Avar infantry was not there on the table as it spent all its time marching to get to the Romans.

So yes its is possible in TDIC for a larger army to be defeated by a smaller one. Next time we will see if it works if the Avars play better.

Wednesday 14 August 2013

Back to the Future with the Die is Cast ancient rules

This article explains how I started the Die is Cast rules back in 1992 and how I gradually designed the new version for 2012.

My initial experience with ancient wargaming started with the popular Wargames Research Group rules (WRG) in 1971. At the time they were fairly much the universal ancient wargames rules although of course there were other sets that had their own fans. But the spell was broken with the release of 7th edition WRG in 1986, a lot of people including myself did not like them and we simply carried on playing with WRG 6th edition. But my own interests were for refighting actual historical battles rather than the equal points games that you get on normal club nights. So in 1992 I developed my own set of rules, Alea Iacta Est (the die is cast) with the emphasis on refighting battles from history. A points system for these rules was a waste of time as real commanders just turned up with whatever troops they could muster, they were not interested in making a battle fair. And I introduced a few wrinkles of my own after the experience of using other rules, including Peter Gilders In the Grand Manner, Napoleonic rules.

So the original Alea Iacta Est had very much simplified morale rules for light troops, a combat result table as in the WRG rules but using decimal results (like the Newbury rules) so that players did not have to keep track of partial figure casualties if they did not want to, different melee systems for infantry and cavalry and generals of different effectiveness (Phil Barker likened it to ‘buying a pint of charisma’).

But times change, players expectations change as well, so it was time to re-vamp the Alea Iacta Est rules and develop a new edition. In fact over the years the rules had been tweaked, trying to improve what was already there but this time it was going to be a radical modification. Possibly what inspired the change this time was the fragmentation of the ancient rules market. Warhammer Historical had closed, new rules for 28mm individually based figures were being published and similarly for those people using element based armies, there were a number of different rules sets to choose from. The first thing was to realise what people wanted from their rules. Army lists were a definite must, most people will be playing an equal points game at their club or at a tournament, so if you want people to play, that option must be there. The next thing was the combat system, the old combat table was too complex for today’s gamers, what they want to do is roll the dice and see the result. To go along with that, keep it simple, we play to have fun not to get qualifications in gaming. And lastly, the name had to go, people just did not understand what Alea Iacta Est meant.

So the development of the Die is Cast rules started. The big thing to consider was the combat system, a choice of opposed rolls (both sides roll the dice and compare the difference) or simple die rolls with the results indicating a hit or not. In fact I went back to a time before dice, H. G. Wells Little Wars where combat was simply a comparison of the numbers of men involved in a combat. The side with the most men killed the same number as the enemy but might capture some more to give the larger side the advantage. Very simple indeed but also very bloody and without much option to allow for superior quality troops. Since dice per fighting figure has been extremely successful for Games Workshop (GW), that seemed a good system to adopt. The GW standard game system introduced in the Warhammer Fantasy Battle rules requires the now familiar; roll to hit, roll to wound and roll to save system. Lots of rolls reduce the vagaries of chance and lets the players have a lot of fun. But three rolls seemed a bit excessive and with idea of keeping things simple, my idea was to get a result with a single roll of the dice. The solution was to allow pairs of figures to use one die and to cover everything in that one die roll but the traditional six sided die was a very coarse tool. So to give more variation in the roll, D12’s are used instead. Surprisingly when I recently bought Tony Baths Ancient Wargaming, the same sort of system was in use; one die for a multiple of figures (groups of five in the Peltast and Pila rules) and two rolls, to hit and to save. Alright I have done away with the saves but Tony Bath’s rules also have differences for the way that infantry and cavalry fight, exactly as the Die is Cast does. My own rules were returning to the methods that were used in the first ancient rules.

Now according to my original plan the main task would have been over. I had changed the combat system to a simpler one just involving dice, so supposedly it was a small matter to go through the rules and make some adjustments to accommodate the new system. But it was not that easy. Since each group of figures was rolling a die, there was enough random chance in that to eliminate the old combat chart random factor but part of the generals characteristics had been to modify that old random factor. So a new way of generals being able influence the combat ability of the unit that they were with had to be found. Some rules give an ability for the general and their bodyguard to fight themselves but the problem with that method is that it can be used equally to bolster the performance of a weak unit (as indeed does allowing the generals command ability to replace that of the unit that they are with). To encourage generals to lead elite units, my choice is to allow the unit to re-roll some of its failed hits depending on the general’s combat ability. That tends to be of more use to elite troops rather than the rabble, encouraging players to use their commanders to lead their best troops.

So now onto some play-testing of rules and that soon showed that combat had become much more bloody, unbalancing the existing morale system. So the morale table had to be changed to accommodate the new combat results and eventually after a series of games, the gradual damage a unit suffers was eliminated from the rules, vastly increasing the speed of taking a morale tests. But a unit which has suffered severe damage should be reduced in combat potential, so now a unit which has reached fifty percent losses is simply penalised by being unable to advance further and having reduced morale. After further play-testing, routing units and units in march column also had their morale value reduced, to reduce the chance of broken units rallying and marching units resisting an attack. The overall result of these changes was that combat became more brutal and that broken units were unlikely to be rallied, so battles could indeed be short and sharp.

After playing WRG 6th edition, my rules of choice for 28mm scale games was Warhammer Ancient Battles (WAB), which saw years of adaption’s by the players more away from the original fantasy game system to something like historical battles. The combat results of WAB had always depended on the addition of a rank bonus but in WAB2 the importance of that had been greatly reduced, so that units no longer had to be formed into small columns to be effective and allowing lines of battle to be established rather than a scattering of units over the table-top. Nothing like rank bonus applied in the Die is Cast, so that was not a problem but there were several good rules which seemed useful to adopt; a much larger force losing a melee but hanging on in there was one, provision for an effective impetuous charge and the associated difficulty of controlling those troops another.

Now the original Die is Cast rules had always been designed for individually based figures in the style of WAB or WRG 6th. But one of the key tenets for the Die is Cast is that any scale or basing of figures can be used with the rules. So a separate section has been added to the rules allowing the use of element based figures. With the new combat system, that was easy to do simply by defining the number of attacks and the number of hits each base can take. That allows a player to move between playing armies with a different figure scale or basing system and keep the basic game rules the same.

If the standard version numbering system had been kept to, then these rules should have been version 4 but that version was changed so much that the new rules have skipped a number and are named version 5. Unlike the previous rules, army lists are now published and available for free download on the Veni Vidi Vici web site. The rules themselves are also on the site as a free download or available for purchase in a printed format.

Sunday 28 July 2013

Animal portraits in pastel


howserweb[1]


I came across this artist the other day. He does an excellent job capturing the  likeness of animals in pastel.

Check him out at Animal Pastel.

OK so Veni Vidi Vici goes WW2

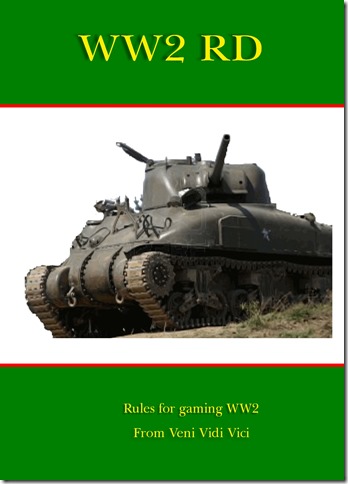
Learning from my experience of writing the Die is Cast the next rules project is WW2. Currently under the working title of WW2 RD.

WW2 RD cover02

Again fairly scale independent its 1 figure equals one man/tank. Learning from TDIC its going to be slightly larger in size 7x10 inches which means that the font size can go up to 10 for easier reading.

Its IGo UGo but instead of that applying to the whole army, its a unit at a time. So players select a unit, perform all their actions with that unit and then the enemy get to do theirs.

Back in 2003 I set up a Yahoo group for this project and that where I will be loading the playtest rules and army lists. Its call the WW2RD group.

Wednesday 3 July 2013

First Die is Cast event

Is going to be held at the North West Gaming Centre, Manchester on Sunday the 20th October.

Because this the first event for the new version of the rules, I intend to take things easy and have only two games on the day.

It will be 1,500 point armies for 25mm, 15mm, 10mm and 6mm scale figures. With all participants having a chance to win the main prize, a copy of the board game Spartacus – Blood and Sand. I have played the board game and its a lot of fun.

The rules are available here and the army lists here. Just shout if there is an army list that you need to be published. The version of the rules that will be used is version 5.3 June 2013. The online (free) versions of the rules will be updated shortly to this version.

Further updates and the event details will be posted here as they are available.

Event info.

Venue, see above. Fee £5 per gamer, please PayPal me at: zedeyejoe@gmx.com or just pay me on the day.

Arrive: 9.00 – 10.00
First game: 10.00 – 12.30
Lunch: 12.30 – 13.30
Second game: 12.45 – 16.00
Results and roll off for the Spartacus game: 16.20 then we all go home

Food and drink is available to buy at the centre and is the only food and drink to be consumed at the centre. So if you bring your own please eat outside. Veggie choices are available.

Rules, as written. Orders will not be used (optional rule) but scouting will be.

All armies up to 1,500 points (yes that does mean 1,501 is over the limit). Army lists are available online (see above) shout if anything you want to use is not listed. Lets say 1100 AD is the time limit for armies, so no knights or gun powder weapons for which there are no rules anyway.

Army lists to me (zedeyejoe@gmx.com) in either plain text or Word format please on or by 5th October please. You can try other formats and I will let you know if they work or not. A list needs to show the number of units of each type used, the number of figures/elements used and the points values.

Players can use either 25/28mm, 15mm, 10mm or 6mm armies. Three streams will be run, the 25mm, 15mm and 6/10mm so that players can play against approximately the same sized figures.

25 (and 28)mm games. Use individually based figures. Notional base frontages; light troops 30mm, cavalry 25mm, infantry 20mm, elephants 60mm, 2 horse chariots 40mm,  other chariots 60mm. If someone is using different sizes just match them up, so that an infantryman fights another infantryman regardless of actual base size. Likewise 2 light troops should match up against 3 infantry or an elephant.

15, 10 and 6mm games. Use element based figures. Each element a notional 40mm width. See section 22 of the rules to see how many figures each element is worth (its the number of wounds an element takes) and point accordingly. 80mm wide elements will be considered two elements, so double everything, the attacks, wounds and of course points cost! 60mm wide elements will be considered honorary 80mm wide elements (so as before, double everything). That should allow for most peoples basing systems. Remember, light troops work best in units of groups of 6 wounds (3 normal elements).

Terrain on tables will be pre-set, no need to bring your own. In the first game I will try to match historical opponents.

Dicing for the Spartacus Game

Every player will have dice and there will be a roll off to see who wins the game.

You get dice for;

2 dice, coming with a fully painted army
2 dice for using a Servile War army
1 die for each player (max 2) who thinks you are a sporting player
1 die for losing a game, 2 dice for a draw and 3 dice if you win.

Games are won or lost on the normal points system (19.9), a draw is where neither player scores more than 150 points more than the other. Games last until the time limit is reached or army break point (19.8), whichever is the sooner.

Any questions please ask.

The Die is Cast army lists up to 30

Just added Ancient British, Early and Later Greek hoplite army lists.

http://uk.groups.yahoo.com/group/tdic2/files/TDIC%20army%20lists/

The Later Greek list is really quite interesting, with a wide variety of upgrades available and some fanatic Gallic mercenaries.

Thursday 27 June 2013

The Die is Cast Sassanid Persians vs Late Romans

After the Society of Ancients battle day, I had the start of a Late Roman army which I have expanded with some artillery, skirmishers and some extra-heavy cavalry. So John Holroyd (my partner in developing TDIC v5) and I decided to have a game against his Sassanid Persians when we were meeting up to see the latest proof copy of TDIC – it is shortly going to get printed by Amazon.

Both armies 1250 points, in 6mm scale.

My Late Roman army,

Four units of legionaries, two units of auxila, two units of auxila archers (upgraded to elite status), two units of foot skirmishers (one with crossbow, one with bows), two units of skirmishing cavalry with bows (upgraded to Steady), two units of skirmishing cavalry with javelins, two units of heavy cavalry and a unit of extra-heavy cavalry. Most of my units were very small, as I hoped to use manoeuvre rather than force to beat Johns army.

Sassanid Persians

Three elephants, three units of peasant levy infantry, four units skirmishing cavalry (all with bows, some with javelins as well), three units of extra-heavy cavalry (with bow and lance) and a unit of cataphracts. Although his infantry was rubbish, Johns advantage was in his cavalry, more heavily armoured and better armoured than mine.

The Late Roman plan was to shoot down the enemy skirmishing cavalry, gain the advantage in mobility (basically the advantage to force the enemy either to move first or second) and then to hit with superiority at a given point.

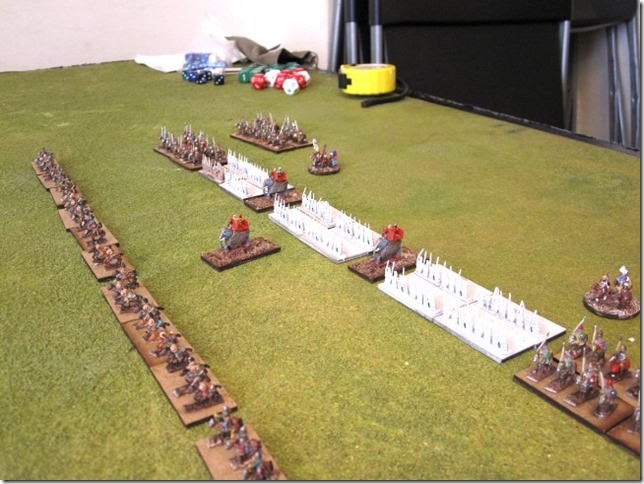
Initial deployment of the armies, with my Romans at the bottom and the Sassanids at the top. You can see that the Roman line is considerably longer than the Sassanid. In my army the artillery have only been undercoated (they are white) and the same with Johns peasants.

tdic062613_01_s

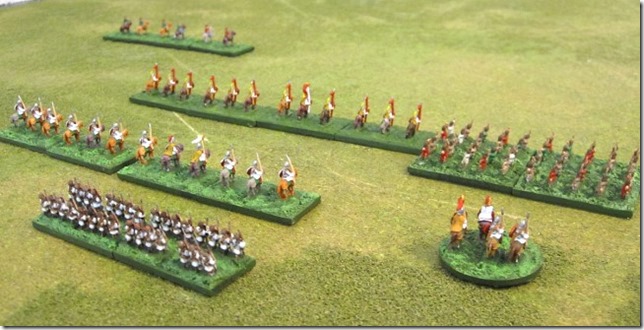
Close up on some of the Romans. The general (a 2/2) on the right, with unit of auxila archers in front. Another unit of auxila in the foreground, with two units of heavy cavalry in front of them, the extra-heavy cavalry in front of them and a unit of horse archers in the distance.

tdic062613_03_s

The Sassanids. Horse archers to the front, elephants mixed in with the infantry, two units of extra-heavy cavalry in the distance.

tdic062613_02_s

The starting move on the Roman right. Both sides cavalry advance and the skirmishers exchange shots, both sides lose a base of skirmishers.

tdic062613_04_s

Second move on the right. One of the Roman light cavalry units flees and the other moves onto the far right. The Sassanids advance with a reduced force of light cavalry with some extra-heavy cavalry and cataphracts coming up behind. A unit of Sassanid light cavalry is sent to deal with the Roman cavalry on the right.

tdic062613_07_s

And the final scene on the right. The Sassanids broke through, destroying the Roman light cavalry, a unit of auxila, a unit of legionaries and in this picture the Sassanid cataphracts about to break through and run down a unit of archers. So a total of five Roman units lost.

tdic062613_10_s

First move on the Roman left. A general advance but now the Roman light cavalry can force the Sassanid extra-heavies to move either first or second because of their greater speed.

tdic062613_05_s

End on the Roman left. With superior numbers, the Romans destroyed a unit of extra-heavy cavalry and the others wisely decided to move away. One elephant has been killed and the other two wounded – another was killed when the remaining elephants changed some legionaries. One unit of the levies has been destroyed and another forced to retreat. The Romans have taken some losses but only the odd casualty here and there.

tdic062613_09_s

The end view of the battlefield. In the centre another elephant dies and the levies are routed. So with the Romans winning on the left and centre, its a win for the Romans but at the cost of the entire Roman right flank.

tdic062613_11_s

It was noticeable how heavily armoured cavalry really cuts down the casualties from shooting. Most of the time shooting (on both sides) needed a lucky one to hit. So lots of dice being rolled but causing few hits. On the left the combat between the Sassanid and Roman extra-heavy cavalry was an even match, but throwing in the supporting Roman heavy cavalry swung the balance and resulted in a Roman victory. The Sassanid cavalry overwhelmed the Roman infantry (acting as little more than speed bumps) but since they were in the main very small units, few actual bases were lost. The game lasted about two hours. The rules printed by Amazon are a great improvement in both appearance and layout and people who have already bought a copy of the rules will be sent a new copy free of charge.

Sunday 19 May 2013

TDIC – Late Romans vs classical Indians

Learning some lessons from the previous weeks Late Roman civil war, we decided to go for a larger game. 1500 points per side ‘fantasy’ game of Indians vs Late Romans.

I dumped the rear rank of legionary archers that I had used in my last game and instead opted for pure units of legionaries.

So the army was like this

General 2/2
3 units of legionaries (one upgraded to elite)
2 units Roman heavy cavalry
1 unit of cataphracts
3 units of horse archers (all upgraded to steady)
1 unit of javelin armed light cavalry
2 units of auxlia

against, well I am not really sure but it looks like a lot of Indians. Somewhere in that lot were 8 elephants, 5 heavy chariots and 3 light chariots.

My opponent (Dave) is moving his army
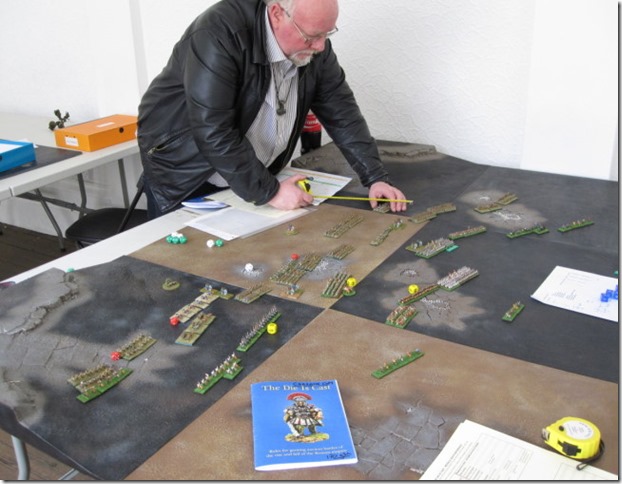
tdic051613_01_s

Following the course of the battle from Roman left to right. See below.

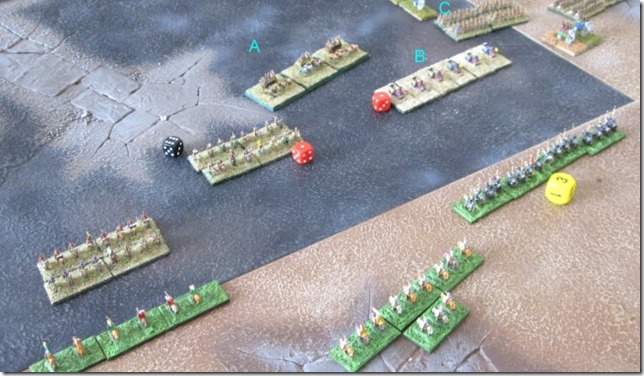
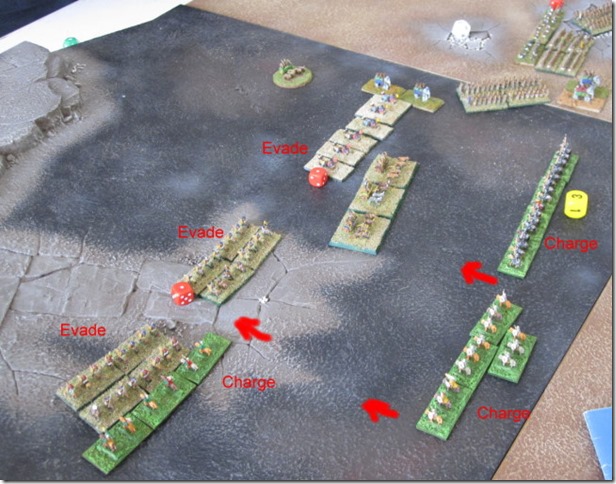
At the end of the second turn on the Roman left, I am forcing the Indians back. I have charged with all three units of Roman cavalry (one light, one heavy and a cataphract unit) to which Dave has countered by evading all three of his units (on the black table board), avoiding contact. Dave has opened fire with three of his units A the heavy chariots, B the evading light chariots and C a unit of foot archers, causing 3 hits on the cataphracts. Just short of the 4 hits needed to remove a base of cataphracts, so I need to get them into combat before they get whittled down.
tdic051613_02_s

Situation after movement on turn three, I have charged again, again failing to catch anything with the heavy cavalry or cataphracts but the light cavalry (on the left of the picture) catch a unit of Indian cavalry, fight them and break them – under TIDC catching an evading enemy is not an automatic break, the evaders get a chance to fight back but being hit in the rear it is unlikely that they will win. The Indian heavy chariots are moving forward to confront the cataphracts.
tdic051613_08_s

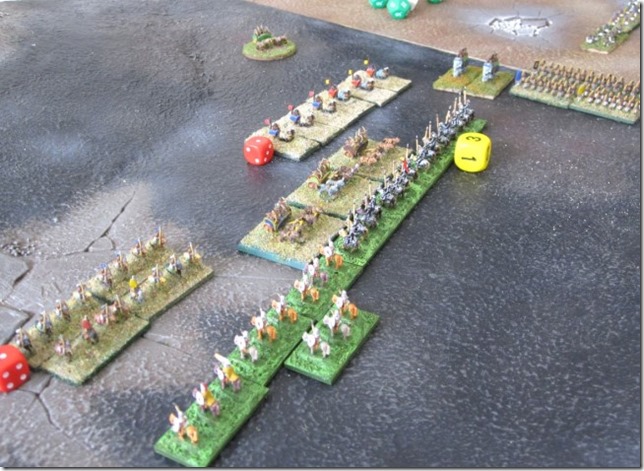
At the end of movement of turn four, the Indian heavy chariots have been charged by both the cataphracts and the Roman heavy cavalry. The Indian chariots had declared a charge against the Roman cataphracts but that had been cancelled by the charge of the Roman cavalry against them, the heavy chariots cannot evade (not an option for them) and cannot counter-charge because the heavy cavalry is within half their charge move, so the heavy chariots have to hold and take the charge at the halt. The Indian cavalry and light chariots, no longer charged themselves, turn round and face their enemy. On the right of the picture you can see the elephants which unform both the cataphracts and the Indian light chariots (too close, despite the Indians being used to elephants), and some Indian archers shooting at the charging cataphracts.
tdic051613_09_s

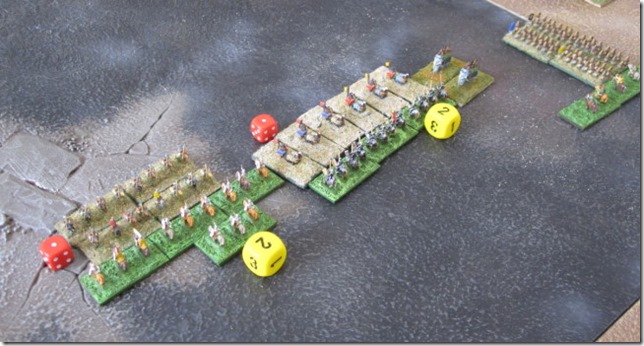
The Indian heavy chariots were heavily defeated (7-1) and broke. The cataphracts pursued into the light chariots, the Roman heavy cavalry pursued into the Indian medium cavalry. But the elephants also charged the flank of the cataphracts and a unit of Roman horse archers charged into the flank of the Indian archers. We ran out of time at this point but the cataphracts would have certainly been beaten, the cavalry/cavalry combat would probably been a victory to the Romans and the light cavalry attack might or might not have been successful.
tdic051613_10_s

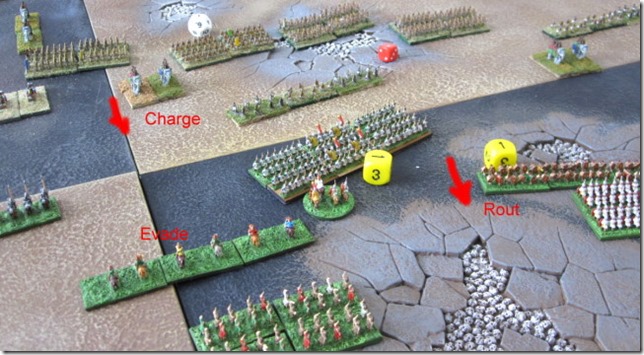
In the centre, things did not go the Roman way. On turn three, I had charged into a unit of Indian skirmishers with a unit of auxila but thrown awful morale dice and routed rather than charged. The Indian elephants charged a unit of horse archers who wisely evaded the elephants. But all that did leave my legionaries (led by the Roman general) sitting out there with their flanks exposed.
tdic051613_03_s

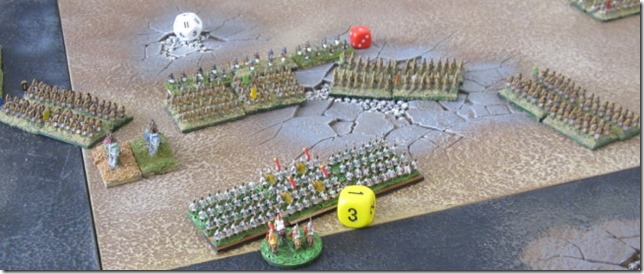
The situation in the centre just continues to get worse for the Romans
tdic051613_07_s

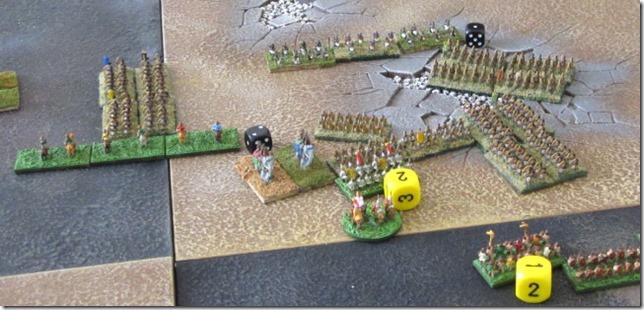
Situation in the centre at the end of the game. Attacked frontally and then in the flank the Roman legionaries are chopped to pieces. The Roman auxila (bottom right) have again failed to roll good dice and have become Shaken and refuse to support their general, the survivors would almost certainly be slaughtered and the general killed. Motto, keep that combat line intact and don’t expose your flanks to the enemy. Big mistake on my part.
tdic051613_11_s

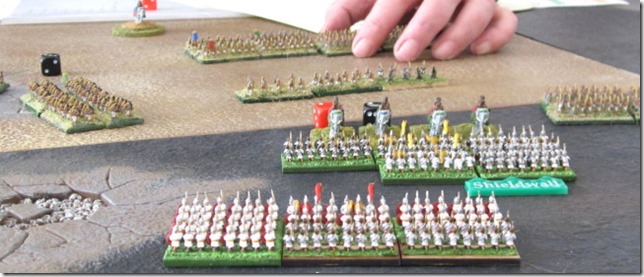
On the Roman right a unit of Roman legionaries come under threat by four elephants and wisely form shieldwall the resist the charge. Meanwhile a unit of elite legionaries take up position behind them, either to reinforce the melee next turn if the other legionaries hold the elephants or to hold the elephants if they break through.
tdic051613_06_s

Well it was a break-though by the elephants, wiping out the front unit of legionaries. But the elite legion and the auxila held, fighting in the next round (and last round of the game) inflicting another 7 hits and with the 5 hits that the elephants had suffered, three elephants would be dead, in effect removing that threat. But the loss to the legionaries was grievous, 2 entire bases of legionaries killed (8 hits) and 3 hits (thats what the yellow dice represent) on the auxila. So a combat result of 11-7, a loss to the Romans but not a major one.

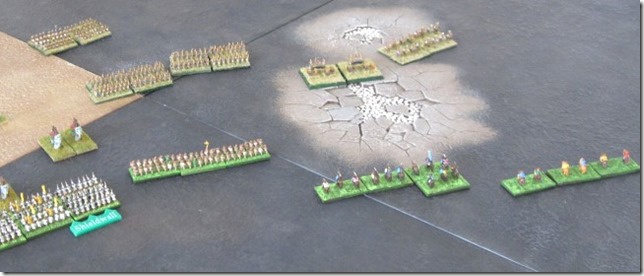
On the Roman right, a unit of heavy cavalry and a unit of horse archers gradually fall back in front of the advancing Indians.
tdic051613_12_s

But something has to be done to stop the Indian heavy chariots from getting onto the flank of the Roman infantry. So the heavy cavalry charge the heavy chariots (who are also charging them). The combat was almost complete destruction of the Roman cavalry but one chariot was destroyed and that automatically made the Indian unit shaken, with no possibility to further advance against the enemy.
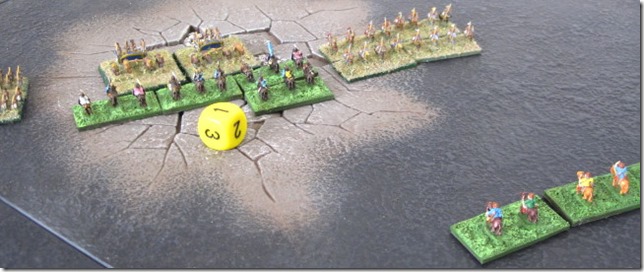
tdic051613_14_s

So with the Roman right gone, the centre and general killed and the cataphracts wiped out, this was a major victory for the Indians.

The Romans had the advantage of mobility with their light cavalry but I failed to make the most use of it. The cataphracts are stunningly formidable but need light cavalry in support, both to screen them from missile fire but also to catch any enemy trying to get away from their advance. And as for the legionaries, the motto should be maintain the line and don’t let the enemy get at your flanks!
Friday 10 May 2013

TDIC a very Roman civil war

After the Chalons battleday I thought I would have enough figures to do a Late Roman army, more fool me. When I worked it out I needed infantry, lots more infantry and some troops types like cataphracts which were not in the Chalons order of battle. So after a couple of days painting I had enough for a real army, just as I was challenged to a game by Simon Peyton, who also planned to use a Late Roman army, so the scene was set for civil war.

My army (1,000 points using figures based for Warmaster Ancients) was as follows;
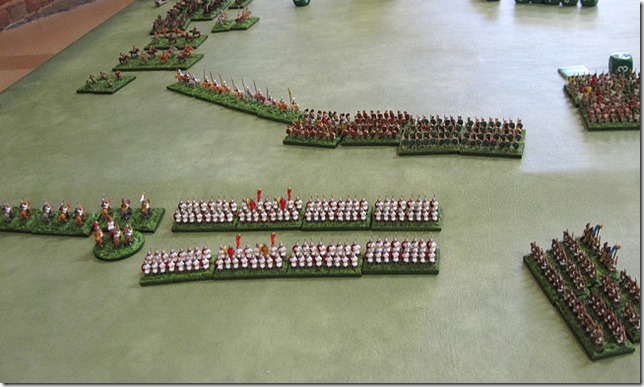
General 2/2
Roman heavy cavalry unit of 4 bases
Roman light cavalry unit 3 bases
3 units of legionaries, each 3 bases of medium infantry with 3 bases of archers in rear ranks
A unit of auxila 3 bases
Two units of horse archers, 3 bases each
A unit of cataphract cavalry, 4 bases.

Simons army was very similar but he had only two units of legionaries, all legionaries (no archers), his cataphracts were only 3 bases strong and he had upgraded his heavy cavalry to steady.

We played at Worthy Games in Preston, with some of our own terrain added to the gaming table (see below).

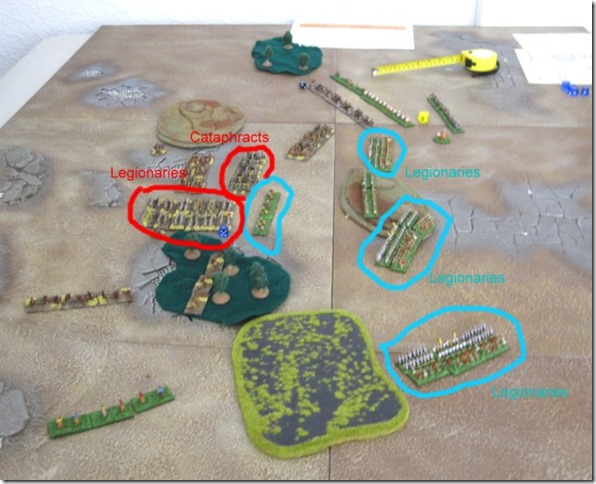
This is the situation at the end of movement of turn 2. My own three units of legionaries are circled in blue, also I have used a unit of light cavalry (using forced movement) to box in Simons legionaries and cataphracts (circled red). At the top of the picture, the majority of my cavalry is facing off against Simons horse archers. At the bottom left, a unit of my horse archers are trying to sneak round the marsh and the wood, to get behind the enemy.

tdic051013_01_s


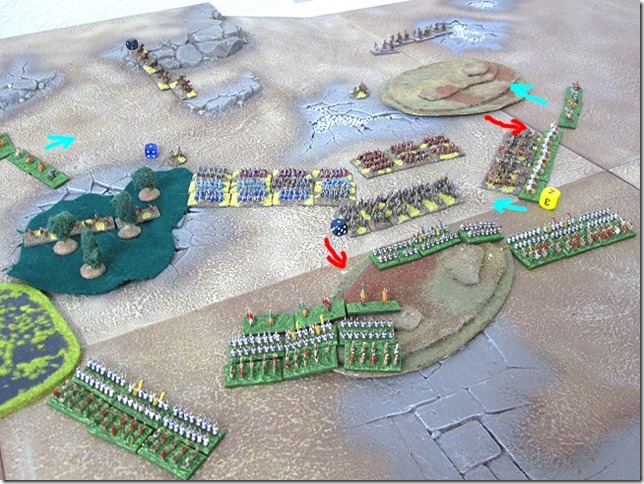
At the end of movement on the third turn. In the centre, Simons cataphracts charged my horse archers who evaded the charge and left the cataphracts facing my auxila (now occupying the hill). On both both flanks (see blue arrows) Simons light cavalry was routed by being charged and his units failing their morale checks. Also on the right of the picture, both units of Roman heavy cavalry charge. Simons cavalry is outnumbered 3 to 4, due to some shooting losses he took earlier.

tdic051013_02_s

A close-up of the situation in the centre. Simons legions (on the left) have expanded into battle formation three bases deep and his auxila are advancing behind his cavalry.

tdic051013_03_s

At the end of combat on turn four. Simons cavalry has been destroyed by the reinforcement of the cavalry melee on the right by my cataphracts (blue X marks the spot). That means that the flank of his auxila will be vulnerable to a charge by my cataphracts next turn. In the centre his cataphracts won the melee against my auxila but not sufficiently to break them. That means that the combat will continue but one of my legionary units will be able to charge onto the flank of his cataphracts in the next turn. Both of my light cavalry units have got behind his army (blue arrows at the top of the picture).

tdic051013_04_s

The end of the battle, at the end of turn 6. Simons cataphracts and auxila have been broken (both were charged in the flank after all) see red arrows on the left of the picture. Simons three remaining intact units are circled in red. A unit of light infantry in the wood and two units of legionaries in combat, currently holding their own but surrounded and likely to be beaten in combat. My three units of legionaries are circled in blue. My only serious loss was my heavy cavalry, reduced to half strength (white shields at top of picture) and so automatically Shaken and unable to continue the attack. The yellow dice are used to mark partial casualties on units, where the casualties have not been sufficient to remove a full base (light troop bases take 2 hits each, cavalry 3 and cataphracts/infantry 4 hits).

tdic051013_05_s

Simon conceded the game but not bad play for his first attempt.

Sunday 14 April 2013

Chalons – the final battle

Well after weeks of preparation, both armies were fully painted and we headed off to the Society of Ancients battle day at Sycamore Hall, Bletchley.

There were 15 games in progress, all fighting the same battle but using different rules. The only other game using 6mm figures was the battle being played under Warmaster Ancients and they had twice as many figures as we had.

It was all very tight and we had no real space to display all the bumf that I had prepared to go with the game, but there were some railings behind the game that I managed to stick stuff on to. So it looked like this

soa_chalons01_s 

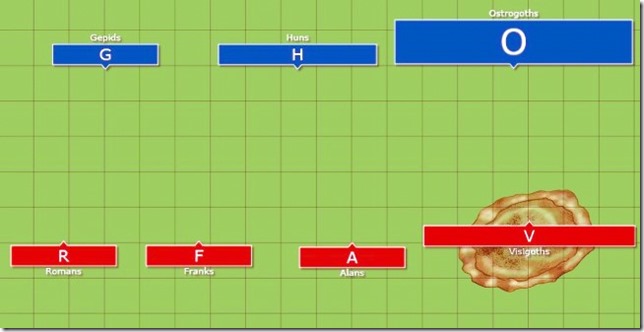
A map of the deployment. Details of the scenario, here.

Chalons_Deployment

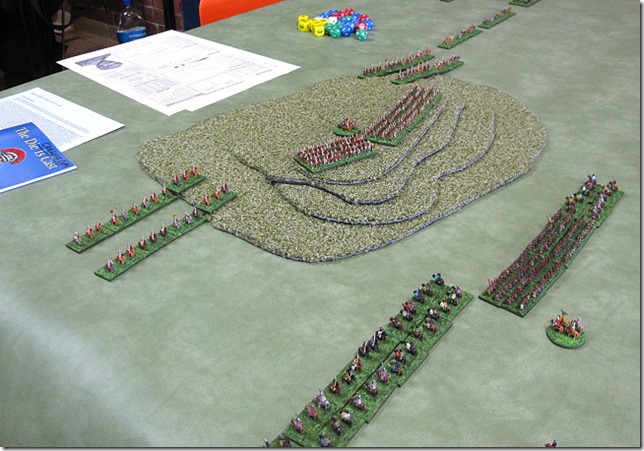
Now this is a picture of the first turn, a mass of Ostrogoths approaching the hill. As has been proven from previous try-outs of the battle, the best strategy is for the Ostrogoths to try and force a passage through on the right flank of the hill. This time the Ostrogoth player massed four units (of the six that he had available) of cavalry and was opposed by two units of Visigoth cavalry.

soa_chalons04_s

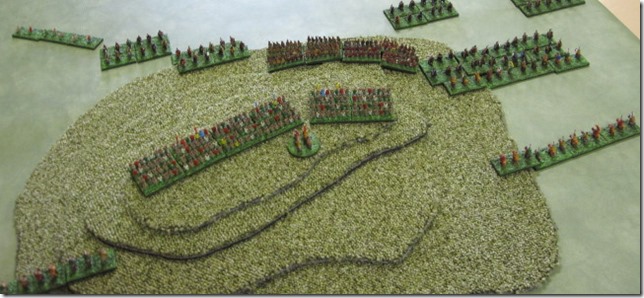
Contact is made, two units of Ostrogoths against one unit of Visigoths

soa_chalons05_s

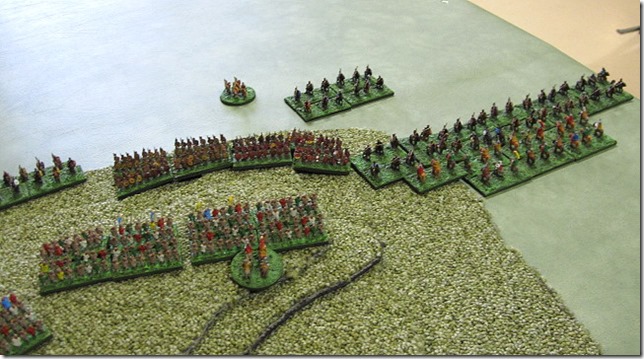
Now a feature of the Die is Cast rules are that in subsequent rounds of melee, additional ranks of cavalry can join the fight, so both sides now throw in another cavalry unit each into the combat on the right of the hill.

soa_chalons06_s

The result cripples the Visigoths, although both sides lose 2 bases of cavalry in the combat, the Ostrogoths outnumber their enemies by 2:1 and so can afford to exchange losses knowing that at this rate, some of them will be left alive when all the Visigoth cavalry are dead.

soa_chalons07_s

In the next round of combat, the Ostrogoths add another unit of cavalry to the fight but still mange to lose the combat and one of their units of cavalry is forced to retreat. That still leaves three units of Ostrogoth cavalry fighting two rather beaten up units of Visigoth cavalry.

soa_chalons08_s

But the serious combat begins on the hill. It is vital for the Visigoth infantry to beat the Ostrogoth infantry before the enemy cavalry (which looks increasingly certain to win on the flank) is able to turn onto the flanks of the Visigoths and beat them. The Ostrogoths reinforced their attack with a unit of cavalry, forcing the Visigoths to stand and take the charge but cavalry attacking uphill is still not effective.

soa_chalons09_s

Although the Ostrogoths won that round of combat, it was not enough to upset the Visigoths, who were being led by their King Theoderic.

Then in the next round, the Ostrogoths throw another unit of cavalry up the hill into fresh Visigoth infantry, lose the combat and are broken. Like a wave, the fear spreads thoughout the Ostrogoths and both units of their cavalry and all their infantry flee down the hill. However on the right of the hill the Visigoth cavalry has been destroyed, leaving the flanks of the victorious infantry wide open. On the plus side, two of the Ostrogothic cavalry units are so damaged that they are blown and cannot advance further, another of their units of cavalry has headed off in wild pursuit of the routing Visigoths and the remaining Ostrogoth cavalry unit is being persuaded to stop their retreat and head back to the fight.

soa_chalons11_s

But the Huns have advanced through the centre of the Roman forces, swept the Alans aside without even having to fight them. Now they have swung round to attack the flank of the previously immobile Romans (with great success) and attack the pursuing Visigoths.

soa_chalons12_s

Whilst two of the Visigothic infantry units continue the pursuit of the fleeing Ostrogothic infantry – deaf to their commanders orders to halt the pursuit. The hill is now attacked from three sides and the remaining Visigoths crumble under the assault.

soa_chalons15_s

The Roman sub-commander, having led the centre is pursued and overrun with his remaining unit of cavalry, dying in sight of Aetuis now leading his legions against the Hunnic right wing.

soa_chalons16_s

soa_chalons13_s

But Aetius was unsuccessful, Gepid lancers destroyed the elite Roman cavalry and the Frank/German infantry fought the legions to a draw.

So with the hill taken by the Huns, the Roman centre smashed and the Roman left unable to make a difference, we declared the game a stunning victory to the Huns.

Why did it happen? Well the victory of the Ostrogoth cavalry on the right of the hill was the start of it. The Roman forces just cannot afford to fight a game of attrition. The Romans really need to win on the right and then be able to successfully attack the Huns in the centre and the Roman left can support them in that. But the Romans cannot win the day on their own.

In points terms the Huns have a slight advantage in points, 1800 against the Roman 1700. It might be interesting to add another 100 points of troops to the Roman side and see how an equal points battle will go.